Introduction
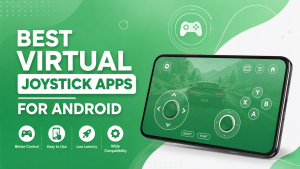
A virtual gamepad allows you to turn your Android smartphone or tablet into a wireless gaming controller, making it easier to play games on a PC, console, or even another Android device. Instead of purchasing a physical controller, you can use your phone’s touchscreen as a fully functional gamepad with customizable buttons, joysticks, and triggers.
Modern virtual gamepad apps support Wi-Fi, Bluetooth, and sometimes USB connections, giving gamers multiple ways to connect their devices. Many apps also include advanced features like custom controller layouts, vibration feedback, button mapping, and low-latency performance to deliver a smoother gaming experience.
Whether you’re playing racing games, action titles, retro emulators, or cloud games, learning how to set up and optimize a virtual gamepad can improve both comfort and responsiveness. This guide explains everything you need to know, from preparing your Android device to configuring controls and fixing common connection issues.
What Is a Virtual Gamepad on Android and How Does It Work?
A virtual gamepad is a mobile application that transforms your Android device into a digital gaming controller. Once connected to a compatible PC, console, or another Android device, the app displays virtual buttons and joysticks that function similarly to a traditional game controller.
Instead of pressing physical buttons, you interact with on-screen controls. Every input is transmitted through Bluetooth, Wi-Fi, or USB, allowing the connected device to recognize your phone as a controller. Many apps also support vibration feedback, customizable layouts, and controller profiles, making them suitable for different types of games.
Virtual gamepads are especially useful for casual gamers, emulator users, and anyone who wants a portable controller without purchasing additional hardware.
How a Virtual Gamepad Replaces a Physical Controller
A physical controller provides dedicated buttons, analog sticks, and triggers for gaming. A virtual gamepad recreates these controls digitally on your Android screen while keeping the experience surprisingly similar.
After establishing a connection, the app sends every tap, swipe, or joystick movement directly to the connected device. Many applications even allow users to reposition buttons, adjust joystick size, and customize trigger placement to match their playing style.
Although touchscreen controls may not completely replace professional gaming controllers for competitive players, they work extremely well for casual gaming, remote PC gaming, and emulator-based gameplay.
Some virtual gamepad apps also support:
- Custom button layouts
- Analog stick adjustments
- Vibration feedback
- Motion controls
- Multiple controller profiles
These features help create a more personalized gaming experience.
Benefits of Using a Virtual Gamepad for Android Gaming
Using a virtual gamepad offers several advantages over relying solely on touch controls or purchasing an additional controller. Since your smartphone is always with you, it becomes a convenient gaming accessory whenever you need it.
One of the biggest benefits is flexibility. You can switch between different controller layouts depending on the game, save custom profiles, and even connect to multiple devices without carrying extra hardware.
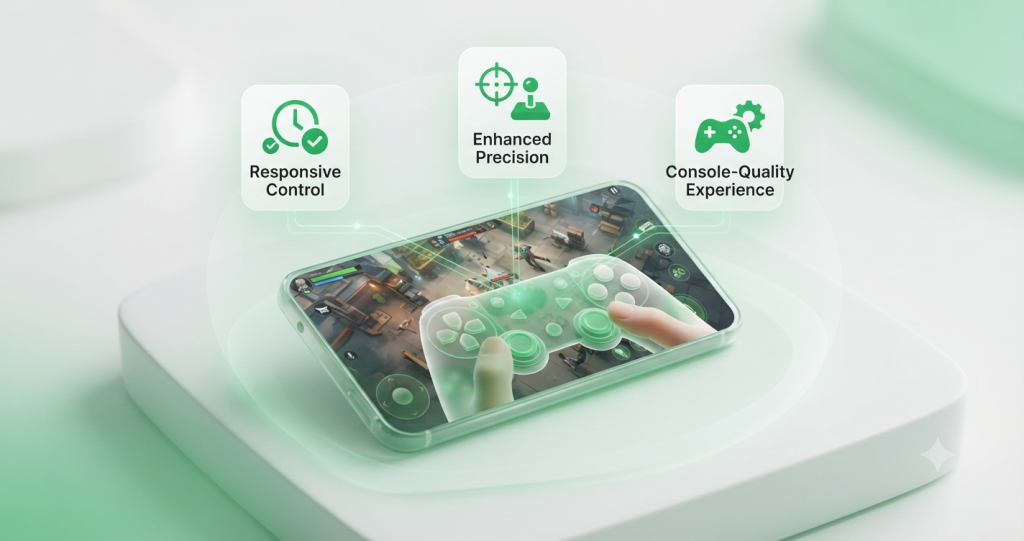
Other important benefits include:
| Cost-Effective | No need to purchase a physical controller. |
| Portable | Your smartphone becomes the controller. |
| Customizable | Modify buttons, joysticks, and layouts. |
| Wireless Connectivity | Connect through Wi-Fi or Bluetooth. |
| Emulator Support | Works with many Android and PC emulators. |
| Easy Setup | Most apps can be configured within minutes. |
For gamers who frequently switch between mobile devices and PCs, a virtual gamepad provides an affordable and practical solution.
Get Your Android Device Ready for a Virtual Gamepad
Preparing your Android device before installing a virtual gamepad helps prevent connection problems and improves gaming performance. A few simple checks can make the setup process much smoother while ensuring the application runs efficiently.
Before downloading any app, confirm that your device meets the recommended system requirements and that essential features such as Bluetooth or Wi-Fi are working correctly.
Check Android Version and Device Compatibility
Not every virtual gamepad app supports every Android device. Some applications require newer Android versions to access advanced controller features or maintain stable wireless connections.
Before installing the app, check your device’s Android version in the system settings and compare it with the application’s minimum requirements.
It’s also important to verify compatibility with the device you plan to control. While some apps are designed for Windows PCs, others support Android TVs, gaming consoles, or additional Android devices.
The following table provides a general compatibility overview.
| Android Version | Recent Android release recommended |
| Available Storage | Enough free space for installation |
| Bluetooth | Required for supported apps |
| Wi-Fi | Recommended for low-latency gaming |
| Compatible PC Software | Required by some applications |
Checking these requirements beforehand reduces the chances of installation or pairing problems later.
Enable Required Permissions and Wireless Connections
After installing the application, Android will request several permissions that allow the virtual gamepad to function correctly.
Depending on the app, you may be asked to allow Bluetooth access, nearby device permissions, notifications, or network connectivity. Grant only the permissions requested by the official application and avoid installing modified versions from unknown sources.
A stable wireless connection is equally important. If your app supports both Bluetooth and Wi-Fi, choose the connection method recommended by the developer. In many cases, Wi-Fi offers lower latency for PC gaming, while Bluetooth is more convenient for nearby devices.
Before continuing, make sure that:
- Bluetooth is enabled (if required).
- Wi-Fi is connected and stable.
- Battery Saver mode isn’t limiting background activity.
- The app has the necessary permissions.
- Both devices are ready for pairing.
Completing these steps before connecting your gamepad helps ensure a smoother setup process.
How to Use a Virtual Gamepad on Android
Once your Android device is properly prepared, you’re ready to install the application and connect it to your preferred gaming platform. Although the exact setup process varies slightly between apps, the overall procedure is very similar.
Following the recommended setup steps helps reduce connection errors and ensures your virtual controller responds accurately during gameplay.
Install and Launch the Virtual Gamepad App
Begin by downloading the official virtual gamepad app from the Google Play Store or the developer’s official website. Avoid downloading modified APK files from unknown sources, as they may contain outdated software or security risks.
After installation is complete, launch the application and allow the required permissions. Some apps will immediately guide you through a setup wizard, while others require you to install companion software on your PC before proceeding.
Before connecting your devices, explore the app’s settings to familiarize yourself with the available controller layouts, connection methods, and customization options.
Connect to Your PC, Console, or Another Android Device
The next step is pairing your Android device with the system you want to control. Most virtual gamepad apps support Wi-Fi, Bluetooth, or USB connections, although the available options depend on the application and your hardware.
For PC gaming, many apps require companion software that receives controller input from your phone and translates it into commands recognized by Windows. If you’re connecting to another Android device or a supported console, simply follow the pairing instructions provided by the app.
To establish a reliable connection:
- Enable Bluetooth or connect both devices to the same Wi-Fi network.
- Open the virtual gamepad app on your Android device.
- Launch the companion software if required.
- Select your target device and complete the pairing process.
- Confirm the connection before starting a game.
Once paired successfully, your Android phone should function as a wireless game controller.
How to Use a Virtual Gamepad on Android
Configure Controller Layout and Button Mapping
After successfully connecting your Android device, the next step is to configure the controller layout. Most virtual gamepad apps let you customize the position and size of buttons, analog sticks, and triggers to match your gaming style.
If you’re playing different types of games, consider creating separate layouts for each genre. Racing games often benefit from larger steering controls, while shooting games require quick access to action buttons and triggers. Spending a few minutes adjusting the layout can make gameplay more comfortable and reduce accidental touches.
Some advanced apps also support button mapping, allowing you to assign specific functions to different controls. This is especially useful for PC games and emulators that require unique controller configurations.
Test Controls and Start Gaming
Before launching your favorite game, test every button to make sure the controller responds correctly. Most virtual gamepad apps include a built-in testing screen where you can verify joystick movement, button presses, and trigger response.
If a control doesn’t respond as expected, return to the layout settings and make the necessary adjustments. Testing your controller before each gaming session helps avoid interruptions and ensures a smoother experience.
Once everything is working correctly, launch your game and enjoy using your Android device as a wireless controller.
Customize Your Virtual Gamepad for Better Performance
A virtual gamepad performs best when configured for your device and gaming preferences. Small adjustments can significantly improve responsiveness, comfort, and overall gameplay.
Adjust Touch Sensitivity and Control Layout
Touch sensitivity directly affects how quickly your virtual controller reacts. If the controls feel too slow or too sensitive, adjust the settings within the app until movement feels natural.
You should also organize the controller layout so that frequently used buttons are easy to reach. This reduces hand movement and improves accuracy during fast-paced gameplay.
Common adjustments include:
- Increase or decrease joystick sensitivity.
- Resize buttons for easier access.
- Move controls to fit your hand position.
- Adjust trigger placement for comfort.
These changes can make long gaming sessions much more enjoyable.
Create Custom Profiles for Different Games
Different games require different controller layouts. A racing game uses a very different control scheme than a first-person shooter or a retro emulator.
Most virtual gamepad apps allow you to save multiple controller profiles, making it easy to switch between games without having to redesign the layout each time.
For example:
| Racing Games | Larger steering controls |
| FPS Games | Quick-access trigger layout |
| Platform Games | Compact button arrangement |
| Emulators | Classic console layout |
Using dedicated profiles saves time and provides a more consistent gaming experience.
Improve Response Time and Reduce Input Lag
Input lag is one of the most common issues affecting virtual gamepads. Fortunately, several simple adjustments can improve controller responsiveness.
To reduce delay:
- Connect both devices to a stable Wi-Fi network whenever possible.
- Keep your Android device close to the PC or console.
- Close unnecessary background applications.
- Disable battery-saving modes while gaming.
- Use the latest version of the virtual gamepad app.
If your app supports both Bluetooth and Wi-Fi, test both connection methods to determine which performs better in your setup.
Fix Common Virtual Gamepad Issues on Android
Even reliable virtual gamepad apps may occasionally experience connection or performance issues. Understanding the most common problems makes troubleshooting much easier.
Virtual Gamepad Not Connecting
If your virtual gamepad cannot connect to your PC, console, or another Android device, first verify that both devices meet the app’s requirements.
Restart the application, confirm that the companion software is running (if required), and check that both devices are connected using the correct wireless method.
In many cases, reconnecting the devices resolves temporary communication problems.
Bluetooth or Wi-Fi Pairing Problems
Wireless pairing issues are usually caused by disabled permissions, unstable network connections, or previously saved pairing information.
Try the following solutions:
- Turn Bluetooth or Wi-Fi off and back on.
- Remove old paired devices and reconnect.
- Restart both devices.
- Ensure both devices are on the same Wi-Fi network when required.
- Update the app to the latest version.
These steps solve most pairing problems without requiring additional configuration.
Controller Input Delay and Touch Response Issues
Delayed controller input can make games difficult to play, especially in fast-paced genres.
Besides using a stable network, lowering background activity and optimizing touch sensitivity often improve responsiveness. If the issue continues, verify that your Android device isn’t running low on memory or processing resources.
Installing the latest app version may also include performance improvements that reduce latency.
Conclusion
Using a virtual gamepad on Android is an excellent way to enjoy mobile games that support controller input without relying on a physical gamepad. With the right app and proper configuration, you can customize on-screen controls, improve gameplay, and even connect your Android device with PC gaming tools for greater flexibility.
If you’re using virtual controller solutions that require PC integration, ViGEmBus provides the virtual gamepad driver that powers many controller emulation tools. At Vigembus, you’ll find in-depth setup guides, troubleshooting tutorials, and the latest tips to help you configure and use a virtual gamepad on Android with confidence.
Frequently Asked Questions
How do I use a virtual gamepad on Android?
Install a compatible virtual gamepad app, enable the required permissions, connect your Android device to a PC, console, or another Android device using Wi-Fi or Bluetooth, configure the controls, and test the controller before playing.
Which virtual gamepad app is best for Android?
Popular choices include Monect PC Remote, DroidJoy Gamepad Joystick, PC Remote, and Ultimate Gamepad. The best option depends on your device, connection method, and the games you play.
Can I use a virtual gamepad without Bluetooth?
Yes. Many virtual gamepad apps support Wi-Fi connections, and some also offer USB connectivity. Wi-Fi often provides better performance for PC gaming.
Why is my virtual gamepad not connecting?
Connection problems are usually caused by incompatible devices, incorrect pairing, outdated software, disabled permissions, or network issues. Restarting both devices and reconnecting often solves the problem.
How do I reduce input lag on Android?
Use a strong Wi-Fi connection, close unnecessary background apps, disable battery-saving features while gaming, and keep both the app and your Android device up to date.
Does a virtual gamepad work with emulators?
Yes. Many virtual gamepad apps are compatible with popular Android and PC emulators, making them an excellent choice for retro gaming.
How do I update my virtual gamepad to the latest version?
Open the Google Play Store, search for your virtual gamepad app, and install any available updates. Enabling automatic updates ensures you always have the latest version.
How can I improve battery life while using a virtual gamepad?
Lower your screen brightness, close unused applications, disable unnecessary wireless features, and avoid running resource-intensive apps in the background while gaming.
Latest Posts: